
Read about START-PROF pipe stress analysis software
The correct model and boundary conditions are very important for accurate piping stress analysis. Unfortunately, some inexperienced piping stress analysis software users made mistakes caused by lack of knowledge in structural mechanics.
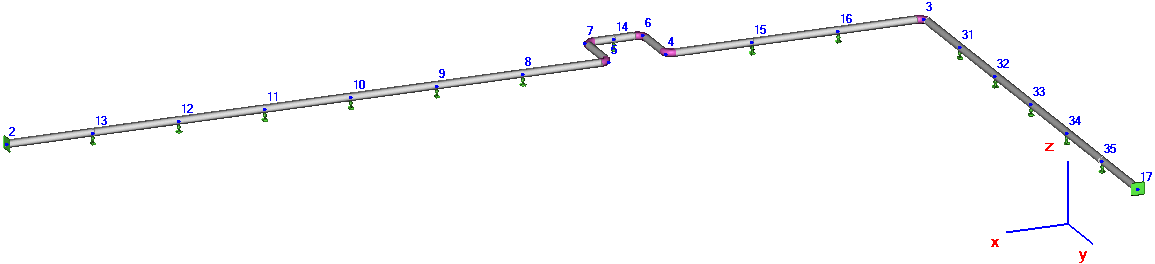
Incorrect boundary conditions at the points where piping continuation is unknown is the most common mistake. It happens when other parts of the piping are designed by other companies or departments. Sometimes the design of these parts is not finished or even started. In this case some engineers create the incorrect piping stress models like shown below. It is the piping model in which some of the ends are free and don't contain any restraints (nodes А, В, С, D, E, F). Free ends - is fictional border between "our" and "other" piping parts. In reality the piping continues after these points. The models below was sent to the PASS/START-PROF technical support by some of our customers.
These models are totally wrong, because the boundary conditions allow piping to expand freely. The stresses, support loads become a very low. But this is just an illusion.
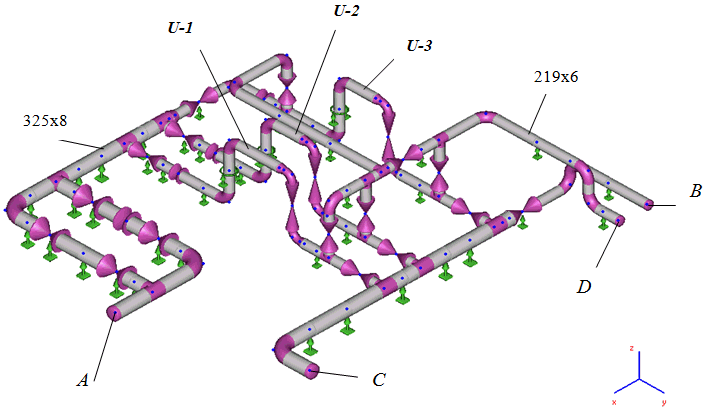
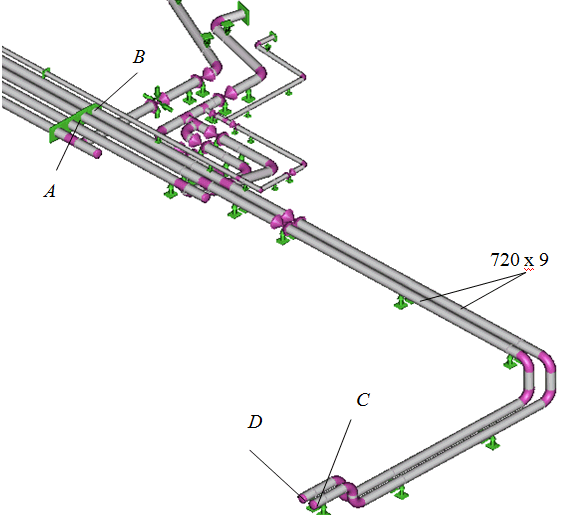
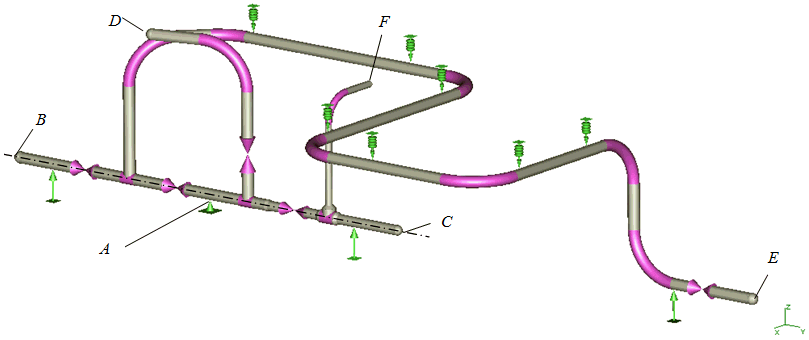
Such models are totally wrong because its behavior and behavior of real piping is completely different. Nodes А, В, С, D, E, F can freely move due to temperature expansion. The stresses and support loads in this model will be much smaller than in real piping.
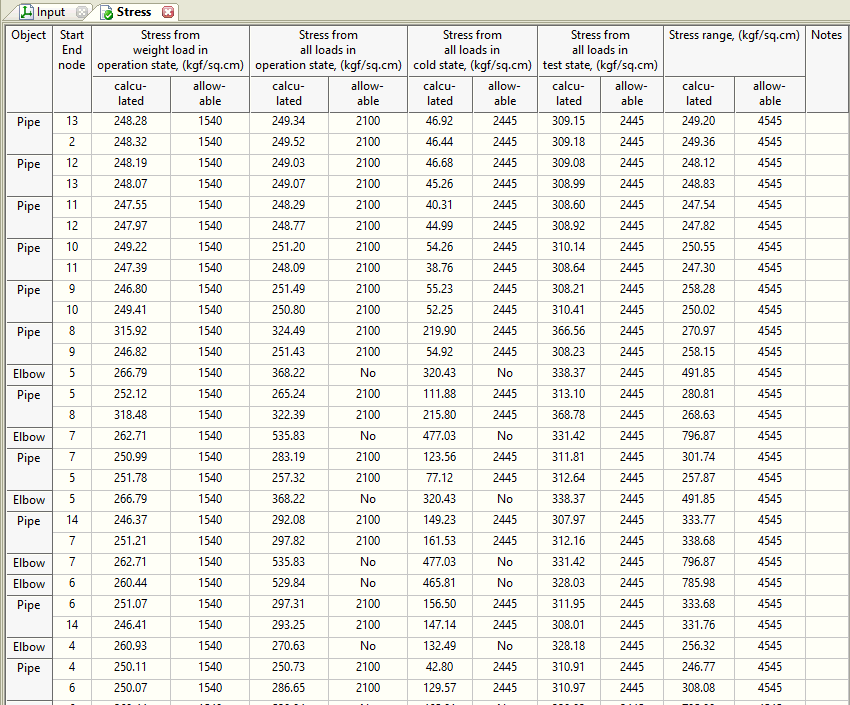
Let's see the difference in results on the example shown below. Pipe 219x6, pressure 1.6 MPa, steel 20, temperature 200 C. Anchor is placed in at node 2, U-shaped loop (5-4), and the continuation after node 3 is unknown.
Example project file: Pipeline continuation.ctp
If we cut piping at node 3 - we will get fixed anchor (node 2) load 653.1 kgf, the stresses satisfy the code requirements.


Example project file: Pipeline continuation-Anchor.ctp
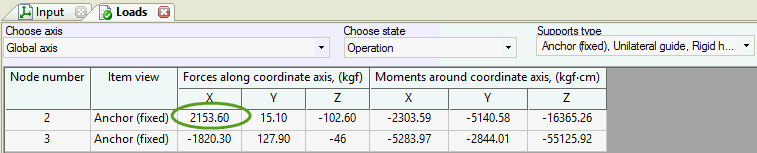
After we place an fixed anchor in node 3 the fixed anchor (node 2) load is much greater - 2153 kgf. Stresses are still satisfying the code requirements. The fixed anchor in node 3 gives us the safety margin comparing to the previous example. But sometimes the safety margin is not enough, see the "model 4" example.


Example project file: Pipeline continuation-L loop.ctp
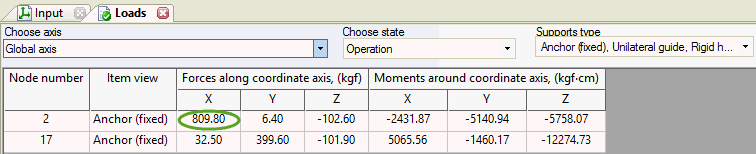
Let's model one of possible variants of piping model after node 3. It's L-shaped loop. The support load is lower than in previous example (model 2) but higher than in model 1 - 809 kgf.
Example project file: Pipeline continuation-Long line.ctp
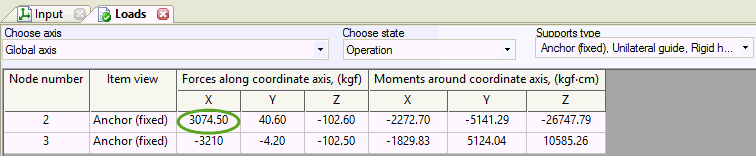
It is the worst case. After node 3 is a long straight pipe. The support (node 2) load is greatest - 3074 kgf. Also the stresses are higher than allowable. Model 4 is the worst because the straight pipe 35-3 doesn't have any expansion loops and it push the point 16 from the right to left.

The piping design after the fictional border (node 3) influences the results very high. That's because the most accurate results can be obtained only if we model the whole piping, not just a part of piping.
In case if it's impossible, it is recommended to place the fixed anchor in fictional end point (node 3).
Possible options in this situation: