Read about START-PROF pipe stress analysis software
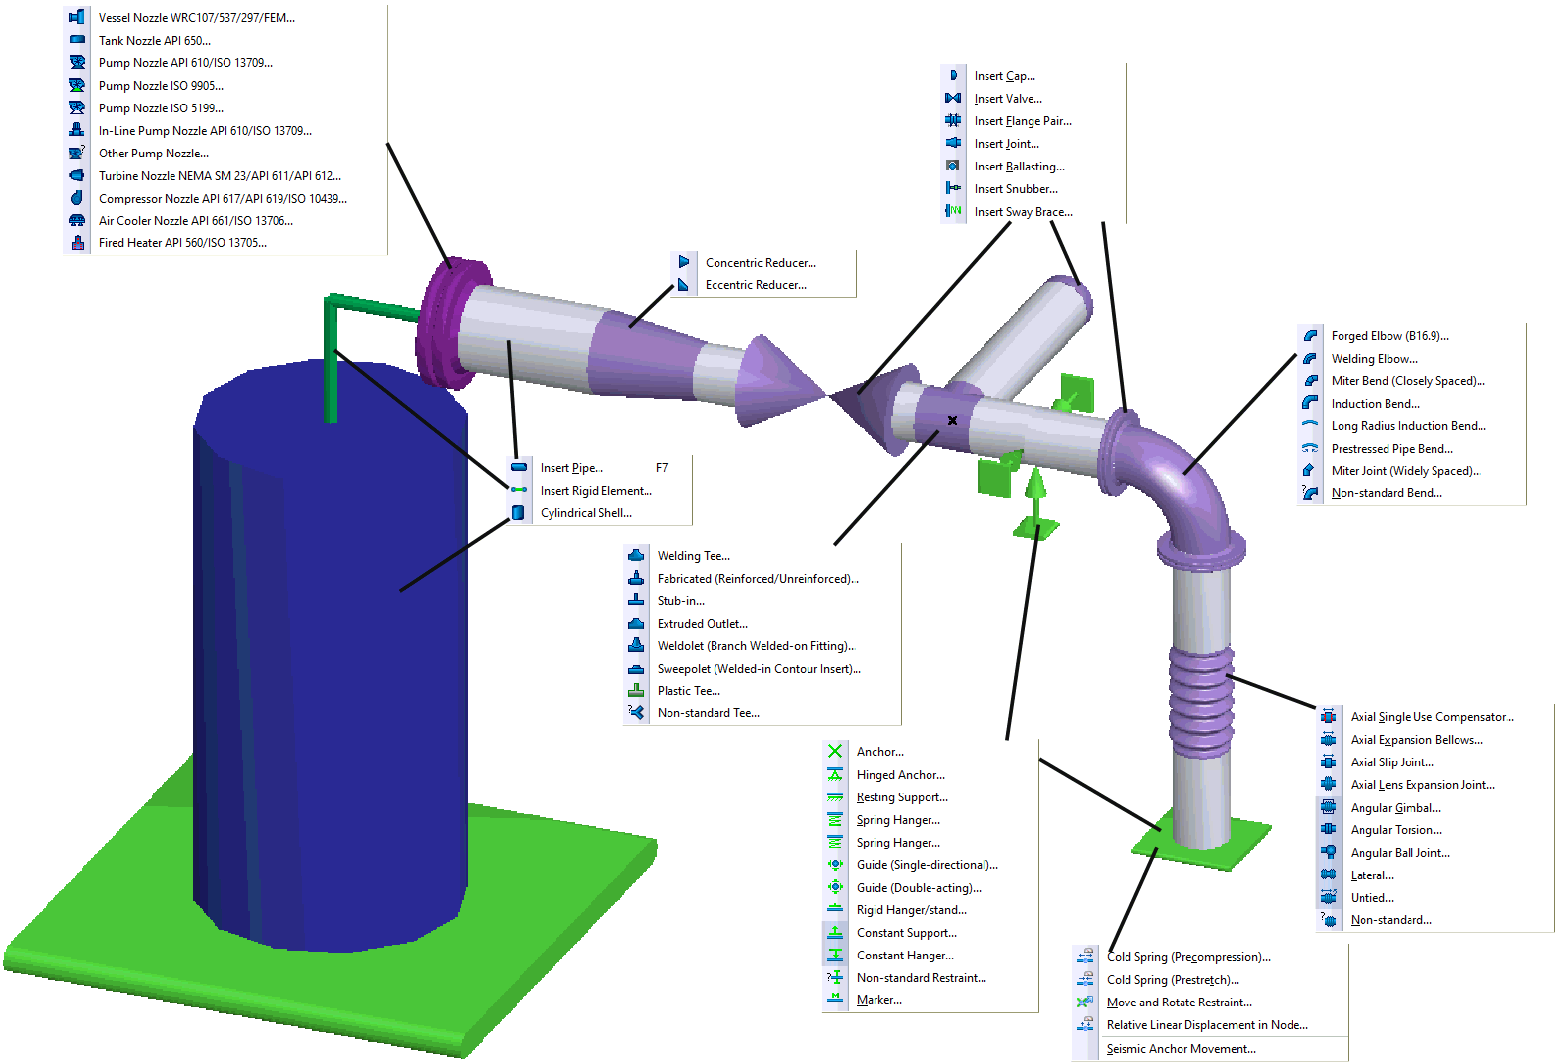
The piping system represented by beam elements consisting of straight beams (pipe elements) and curved elements (bends). Nodes are placed at rod connecting points, where various elements can be inserted. Piping Model - it is simplified piping structure system, without characteristics irrelevant to the analysis. Various models can be created for one Piping, depending on the desired analysis. Using a model is necessary, since it is impossible to simultaneously input all properties of a real Piping. Structural mechanics methods for elastic linear rod systems are used in the analysis.
The model should:
be based on possible deformation and structural damage, supported by practical experience,
accurately represent elastic properties of the structure under loads,
put the structure under conditions less favorable than real (to ensure a strength margin),
not go beyond the limits of theories used for the selected analysis.
To select the appropriate model, experience and knowledge of Piping analysis theories is required. Creating models for real piping is an acquired skill, where various tricks for analyzing a variety of constructions are acquired. To create the correct model, the user must have a good idea of the Piping deformation process and understand which elements are essential for the analysis.
This, as well as other questions, are addressed in START-PROF training.
Using software does not free the user from the necessity of considering how to properly represent the real Piping structure as a model matching the desired analysis.
Before creating the pipe model for pipe and component wall thickness, support spacing, U-, L- and Z-shaped expansion joint dimensions calculation, the START-Elements tool is used.
The piping model data can be divided into following categories:
General properties, input in Project Settings.
Dimension properties for all pipe objects and node elements (Bends, Tees, Reducers, Expansion Joints, Flaws, valve, flange, joint, cap, ballasting weight, etc.)
Restraints and equipment (Supports, Static Equipment, Rotating Equipment)
External forces data. Input in Project Settings and element and node element properties. Support displacement, node deformation and temperature cycles are input separately.
After analysis, output reports are also available.
For specific features see application guide
1. After creative a new project, a dialog window with "Project Settings" will be displayed. Enter all the desired properties and press OK.
2. Next, 3D view window opens and a piping model must be created.